How to DIY Your Own Custom Jacket Patches
Embroidered custom jacket patches first hit the fashion scene in the 1960’s. Thousands of youths protested with patches that promoted different causes.
Since then, jacket patches have been used to show off everything from belonging to a certain association to simply trying out a trend. Whatever you’re using your jacket patches for, it’s never been easier to create your own custom jacket patches!
By creating your own custom patches, you have more freedom to choose the colors, shapes, and designs than you would by just buying them through a vendor.
Embroidered Custom Jacket Patches
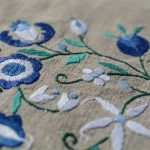
Embroidered patches are an ideal way to show off your hobbies, personality, or simply to add a bit of flair. When you choose to do them yourself, embroidered patches can also be a fun craft that can be done at any age. Do-it-yourself embroidered patches allow you to add a personal element that often can’t be achieved by ordering embroidered patches online.
There are several methods for creating handmade patches that we will cover below. The method chosen will typically depend on the size of the patch, ease, and the material you plan on attaching the patch too. Each method will also require different materials, as well, so we suggest reading through all of the directions before gathering supplies.
Iron on Patches
Iron on patches has been a long time favorite for many, thanks to their ease. One of the benefits of iron on patches is that they can easily be given as a gift, even to those with no sewing experience, by just including a few simple steps.
To create your own iron on patch, start off by choosing a pattern you like. From there you want to carefully mark using a method called the transfer method which involves tracing over the pattern with heat transfer pens or pencils.
Next, stitch your design to the fabric, being sure to leave enough room on the edges. Once you’ve completed this, cut the second piece of fabric (the same size as the original) and two pieces of the paperback fusible web.
Next, iron just one piece of fusible web to the part of your fabric that is not embroidered. Peel off the fusible web. Place your fabric embroidered side down and iron the non-embroidered piece so the fabrics are fused together.
Finally, cut along the lines of the embroidered shape to create the final patch shape you’re looking for.
Felt Sew-On Patches
Felt patches is a slightly easier style as it requires less edge finishing. It also makes it easier to sew the patch directly in place.
To create a felt patch, start by choosing the pattern you want. This time, you’re going to mark your pattern using the tracing paper method. It’s important to make sure you have arranged the embroidery so it has plenty of space for trimming later on.
One of the great things about felt sew-on patches is that you can embroider you patch however you like. Once you’re finished with the embroidering, tear away the paper, being careful not to rip the inside.
Next, finish up your patch by cutting the embroidery into the shape you desire. We recommend following a similar shape to the stitching.
Self-Adhesive Patches
Self-adhesive patches can be a lot of fun. They are just as permanent as traditional patches but with all the ease of applying a sticker!
To make your own self-adhesive patch, start by transferring your pattern to any fabric you prefer using for stitching.
Next, cut off a piece of heavy stabilizer and, laying it behind your fabric, stitch through both layers. Once you’ve finished stitching the stabilizer on the back of the fabric, simply cut around the shape (being careful to cut outside of the stitchwork).
Now use a permanent peel and stick to apply to the back of the stabilizer. Now, just peel the paper off of the adhesive and stick it on to your favorite jacket!
Removable Pin Patches
Removable pin patches are an ideal choice if you want to create pins that can be moved from one item to another without damaging the pin. Creating a removable pin patch isn’t so difficult, either.
To create a removable pin patch, start by transferring your pattern onto fabric and stitching it into place. Cut around the pattern but be sure to leave about a 1/8″ to 1/4″ space around it.
Next, cut the second piece of fabric matching the size of the original fabric. Sew a bar style pin back onto the second layer of fabric, being careful not to pierce through the front.
Finally, embroider around the lining of the pins to create a frame that will hide any knots and create a clean finish.
Create Custom Patches Online
If you want to create your own custom patch without having to deal with the sewing or the embroidery, you can always custom order your patch online.
There are a number of options when designing your own patch online. All you have to do is know the following about your desired patch: the patch color, width, height, shape, font, backing, border type, and any graphics or artwork you would like added on.
This makes it easier to create custom patches, especially if you plan on making multiple patches and want them all to look the same. See more here on creating the perfect custom patch for your jacket.
Ready to Start Your Next DIY Project?
Now that you’ve conquered DIY custom jacket patches, you’re ready to move onto your next project! How about creating your dream space with DIY decor or giving your loyal pup some love with a DIY doggy door?
With a little research, the right information, and great attitude, there’s no end to the projects you can take on. Before you know it you may be running your own jacket patch shop!


